
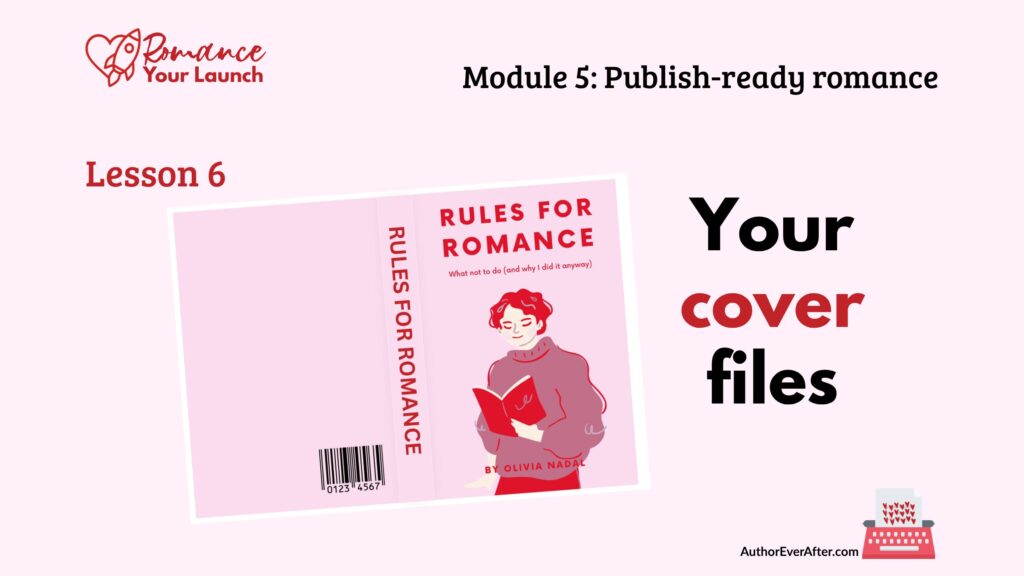
Book cover file specs for self-publishing authors
Your cover designer has delivered your files. They’re beautiful. You love them. You’re ready to upload and get this book into the world. Understanding book cover file specs for self-publishing is the one thing standing between you and that upload screen, and it’s worth fifteen minutes of your attention before you do anything else.
A cover file that looks stunning in your email inbox is not automatically a cover file that’s ready to upload to KDP or IngramSpark. The specifications for each platform are precise, the requirements for ebook and print are completely different, and the consequences of uploading the wrong file range from an error message that sends you back to your designer, to a cover that prints with a white border where your bleed should be, to colours that shift so significantly between screen and print that the book in a reader’s hands looks like a different title.
This lesson is about making sure none of that happens to you. It assumes your cover is already designed and delivered. It’s specifically about understanding what you’ve received, what you still need, and how to check that everything is correct before you upload anything.
Two covers, two completely different jobs
The first thing to understand about romance novel cover files for self-publishing is that your ebook cover and your print cover are two entirely different files that do two entirely different jobs.
Your ebook cover is a single flat image (front cover only) that appears as a thumbnail in storefronts, on your Amazon product page, in search results, and in reading apps. It’s a digital image file, typically a JPG. There is no spine, no back cover, no wrap.
Ebook cover size requirements across the major platforms are pretty consistent: KDP and IngramSpark both recommend a size of 2560 x 1600 pixels, a 1.6:1 height-to-width ratio, and require RGB colour mode. RGB is for screens. If your file is in CMYK (which is for print) it will render incorrectly as an ebook cover and needs to be reconverted.
Your print cover is a single flat file that wraps around the entire physical book (front cover, spine, and back cover) as one continuous image, laid out to the exact dimensions of your specific trim size and page count, with bleed built into every edge. It’s a PDF.
The spine width is calculated from your page count and your chosen paper type, and if your page count changes after the cover was produced, the spine width changes too, which means the file needs to be updated before you upload.
These are two separate deliverables from your cover designer. If you received only one file, you’re missing something.
What you should have received
When your cover designer delivers your files, here’s what a complete delivery looks like.
For your ebook, you need a high-resolution JPG of your front cover sized to at least 2560 x 1600 pixels, with a 1.6:1 aspect ratio and saved in RGB colour mode. These are the ebook cover size requirements for both KDP and IngramSpark, and there’s no wiggle room on them.
For your KDP print cover, you need a full print wrap PDF built to KDP’s specifications for your specific trim size and page count, with 0.125 inches of bleed on all outer edges. These are the print cover file requirements for KDP, and they differ from IngramSpark in ways that matter.
For your IngramSpark print cover, you need a separate print wrap PDF, specifically a PDF/X-1a file (a particular PDF standard) built to IngramSpark’s specifications and saved in CMYK colour mode. This is the most significant KDP and IngramSpark cover difference: IngramSpark requires CMYK for print, and a file created in RGB and converted to CMYK will often show colour shifts, sometimes significant ones. If your cover was designed in RGB, it needs to be properly converted for IngramSpark, and you should order a proof copy to confirm the colours printed the way you expected.
It’s also worth asking your designer about source files before your project closes. You don’t need them to publish, but having the working Illustrator or Photoshop files means that if your page count changes or you want to update cover elements in the future, you or a new designer can make changes without starting from scratch—assuming your cover deigner will allow this use! Some do not.
The spine width problem
Spine width is the measurement that causes the most problems in print cover production, because it changes with your page count. A spine that’s even slightly too wide or too narrow will either fail IngramSpark’s automated check or print with the spine text shifted onto the front or back cover.
Spine width is calculated from three variables:
- your final page count,
- your paper type (white and cream paper have different thickness), and
- your trim size.
Both KDP and IngramSpark provide spine width calculators, and your cover designer should be using these to produce your files.
What this means for you practically: finalise your interior formatting and confirm your exact final page count before your designer produces your print wrap files. If anything changes in your interior after the cover is produced (even by a few pages), tell your designer immediately so the spine width can be recalculated.
How to check your files before you upload
Once you have your files in hand, do these checks before anything goes to a platform. This is your how-to-check-cover-files-before-uploading process, and it takes less time than fixing a problem after the fact.
Start with a visual inspection of every file.
Open each one. This sounds obvious, but a surprising number of authors upload files they’ve never actually opened on their own computer. For your ebook JPG, open it in any image viewer and check that the title, author name, and series information are spelled correctly, then zoom out to thumbnail size and confirm the text is legible. Your ebook cover will be seen most often at roughly the size of a postage stamp in search results and category browsing. Text that looks fine at full size can become completely illegible at thumbnail size. Step back from your screen and squint. If you can’t read the title from across the room, a reader scrolling through search results can’t either.
For your print wrap PDFs,
open each file and zoom in on the spine to confirm your title and author name are correct and fully visible within the spine area. Check the front cover for correct title, author name, series, and any tagline. Check the back cover for correct blurb text, your website URL, and the barcode placement area. Look at the outer edges to confirm the bleed extends beyond the trim line, and check that no important text or design elements are sitting too close to the trim edge. There should be a clear safety margin of at least 0.25 inches between any critical content and the trim line.
Confirm your page count is final before you upload any print cover.
Your print wrap files are sized to your exact page count. If that number changed at any point after your cover was produced, contact your designer before you upload anything.
Use the platform’s previewer during upload.
Both KDP and IngramSpark have cover preview tools built into their title setup process. KDP’s previewer shows you how your cover will appear on the product page and in search results. IngramSpark’s previewer will flag technical errors (wrong colour mode, missing bleed, incorrect dimensions) before you submit. Don’t skip this step. It exists specifically to catch problems before they become expensive.
Order a physical proof before you approve print distribution.
Colours shift between screen and print. What looks vibrant on your monitor can look muted or dark in your hands. What reads as a rich burgundy on screen can print as brown. The only way to know what your cover actually looks like in the reader’s hands is to hold a copy of it.
This matters most for covers with dark backgrounds, gradients, subtle colour variation, or gold and metallic effects, which often don’t translate well to standard print-on-demand. If the proof doesn’t match your expectations, talk to your designer about adjusting the CMYK values and order a second proof before you approve.
🇨🇦 A note for Canadians:
If you order a proof copy from IngramSpark, be aware that they will print in a facility in the USA. In May, 2026, that means when the book hits the Canadian border there is a very high liklihood that you will be charged a tariff. Friends have paid $10 extra due to this fee (which also includes a handling charge.)
File naming and storage
Before you upload anything, name your cover files clearly and store them somewhere organised. You’ll need these files again: when you update your book, when you set up profiles on BookBub or Goodreads, when you run ads, when you produce a new edition.
A simple naming convention that works well is:
BookTitle_AuthorName_FileType_Platform_Date.
So:
- ClosingTime_DanikaBloom_EbookCover_KDP_2026-05-30.jpg, and
- ClosingTime_DanikaBloom_PrintWrap_IngramSpark_2026-05-30.pdf.
Store your files in at least two places (a cloud folder and a local backup) and keep the original files as delivered by your designer, unchanged, alongside any revised versions clearly labelled with the revision date and reason.
If something is wrong
If you discover a problem (wrong spine width, wrong colour mode, missing bleed, a typo), contact your cover designer and be specific. Don’t just say “something looks wrong.” Tell them exactly what the issue is, which file it’s in, and what platform flagged it or what you noticed in your review. The more specific you are, the faster the correction happens.
If your designer is no longer available, another cover designer can usually open source files and make technical corrections. Spine width adjustments in particular are often a quick, inexpensive fix that doesn’t require redesigning anything. Both KDP and IngramSpark have template tools that can help you or a new designer rebuild the file to the correct book cover file specs if needed.
One more thing worth knowing: if you update your cover after publication, the change propagates to future purchases but not to copies already on readers’ devices. On KDP, cover updates are free and typically propagate within a few days. On IngramSpark, cover updates incur a revision fee, worth knowing if you’re ever planning a series rebrand across multiple titles.
What ready actually looks like
Your cover files are ready to upload when:
- You have every file you need for every platform you’re publishing on
- Every file has been visually inspected and confirmed correct
- Your print wrap files match your final page count
- Your ebook cover meets KDP’s ebook cover size requirements (2560 x 1600 pixels, RGB, JPG)
- Your IngramSpark print wrap is PDF/X-1a in CMYK colour mode
- Your files are named clearly and stored in at least two places
When that’s true, you’re ready for the upload lessons that follow, and the cover that drew your reader in from across a digital room will look exactly the way it should when she finds it.
Key takeaway
Getting your book cover file specs right before you upload is not the most glamorous part of self-publishing. But a cover file that fails a platform’s technical requirements, or prints in colours that don’t match what your reader saw online, undermines everything your cover was designed to do. Knowing the ebook cover size requirements, the KDP and IngramSpark cover file differences, and how to check cover files before uploading means your beautiful cover arrives in your reader’s hands looking exactly as intended, every time.
Join Author Ever After
You’ll get immediate and full access to the Romance Your Launch program (all 11 modules), a worksheet for every lesson, plus three weekly, small group support meetings to answer all your questions, and a freaking amazing community of pre-published and early career romance authors who are building their indie publishing careers alongside you.
Get more details about the community here.
Or, go straight to the application form.
Get every lesson in the Romance Your Launch course
—> Click this link and I’ll send you two to three lessons a week, starting with Lesson 1.
—>Or, join my regular email list if you’d rather just pick up from the current lesson.
This lesson is part of Module 5: Publish-ready romance in the Romance Your Launch program.
5.5 Formatting check before you publish your romance novel
Your cover is beautiful. But a stunning cover file that fails a platform’s technical requirements can mean reprints, rejected uploads, or colours that shift dramatically between screen and print. Here’s how to get your book cover file specs right before anything goes live.
5.4 How to format a romance novel for self-publishing
Good formatting is invisible. Bad formatting costs you reviews you didn’t see coming. Here’s how to format a romance novel for self-publishing so your pages disappear and your readers stay in the story.
5.3 Romance book cover design guide for indie authors
Your feelings about what looks beautiful are almost beside the point. A romance cover is a signal, not self-expression. This romance book cover design guide shows you exactly what that signal needs to say and how to say it.

5.2 ISBNs for self-published authors: what you need to know
Before you upload your manuscript anywhere, you need to make one decision that affects every version of your book and every platform it lives on. Here’s what to know about ISBNs for self-published authors before you hit publish.

5.1 Romance novel metadata tips for self-published authors
Your book deserves to be found. But even a great romance novel stays invisible if your metadata isn’t doing its job. These romance novel metadata tips for self-published authors will help you get it right before you hit publish.
4.6 Final manuscript review before publishing your romance
“Almost there” is where a lot of authors stall out. In this lesson, you’ll walk through a final manuscript review before publishing so you can read like a reader, catch small issues that break immersion, and finally feel confident calling your romance done.

4.5 Line edit for a romance novel that feels polished
The line edit is where your romance stops feeling like a draft and starts feeling like a book. In this lesson, you’ll learn how to make your sentences clearer, sharper, and more intentional—without turning your voice into bland, beige prose.
4.4 Scene level edit for a romance novel that hits harder
Scene level edit for a romance novel that readers actually feel The structural edit asked whether your story works; the scene level edit for a romance novel asks whether your story feels. You've fixed the bones: the romance arc is present, the beats are in the right...

4.3 Structural edit for a romance novel that actually works
A structural edit is where you stop fussing over sentences and zoom all the way out to your romance as a whole. In this lesson, you’ll learn how to read your draft for structure, map the romance arc, and spot the big changes that will make everything you revise next actually worth the effort.

4.2 Beta readers for romance authors who want better books
Before you sink weeks into polishing sentences, you need to know if the story actually works for anyone who isn’t you. In this lesson, you’ll learn how to find and brief beta readers for romance authors so you get targeted, story-level feedback that makes revision easier instead of overwhelming.
4.1 Self-editing tips for romance authors who want readers
Self-editing is not a punishment for an imperfect draft; it’s how you give your romance a second life with a clearer head and a sharper eye. In this lesson, you’ll set yourself up with mindset, tools, and support so your edits actually help you reach more readers.
3.5 Social media strategy for romance authors
You do not need to be everywhere online to sell romance. In this lesson, you’ll choose one platform, decide what you actually want social media to do for your career, and build a sustainable posting rhythm that turns curiosity into clicks on your lead magnet.
3.4 Simple romance author websites
Your author website doesn’t have to impress anyone. It has to exist and give readers one clear place to go. In this lesson, you’ll pick an easy platform, claim your URL, write your copy, and build a simple, on‑brand home that points straight to your books and your list.
3.3 Email list setup for romance authors
Followers belong to the platform. Your list belongs to you. In this lesson, you’ll connect your lead magnet to a clean email setup and draft a four‑email welcome sequence so every new romance reader is welcomed, warmed up, and ready when you launch your book.
3.2 Romance lead magnet ideas to grow your email list
Your lead magnet is not a throwaway freebie. It is often the first story a new reader ever sees from you. In this lesson, you’ll choose the right format, length, and emotional promise for your romance lead magnet so it attracts the readers who will go on to buy your books.
Need to go back to a previous lesson?
Return to Module 5: Publish-ready romance to see all six lessons.
Or go back to the Romance Your Launch home page to see all the modules and links to their hub pages.
Want the next lesson in your inbox?
This post is part of the Romance Your Launch series—a lesson-by-lesson guide to self-publishing your romance novel, written for pre-published and early career romance authors.
.
—> Click this link, drop in your name and email address, and I’ll send you two to three lessons a week, starting with Lesson 1.
.
—> If you’d rather just pick up where the series is, join my regular email list from this link.