5.6 Book cover file specs for self-publishing authors

5.6 Book cover file specs for self-publishing authors

Book cover file specs for self-publishing authors

Your cover designer has delivered your files. They’re beautiful. You love them. You’re ready to upload and get this book into the world. Understanding book cover file specs for self-publishing is the one thing standing between you and that upload screen, and it’s worth fifteen minutes of your attention before you do anything else.

A cover file that looks stunning in your email inbox is not automatically a cover file that’s ready to upload to KDP or IngramSpark. The specifications for each platform are precise, the requirements for ebook and print are completely different, and the consequences of uploading the wrong file range from an error message that sends you back to your designer, to a cover that prints with a white border where your bleed should be, to colours that shift so significantly between screen and print that the book in a reader’s hands looks like a different title.

This lesson is about making sure none of that happens to you. It assumes your cover is already designed and delivered. It’s specifically about understanding what you’ve received, what you still need, and how to check that everything is correct before you upload anything.

Two covers, two completely different jobs

The first thing to understand about romance novel cover files for self-publishing is that your ebook cover and your print cover are two entirely different files that do two entirely different jobs.

Your ebook cover is a single flat image (front cover only) that appears as a thumbnail in storefronts, on your Amazon product page, in search results, and in reading apps. It’s a digital image file, typically a JPG. There is no spine, no back cover, no wrap.

Ebook cover size requirements across the major platforms are pretty consistent: KDP and IngramSpark both recommend a size of 2560 x 1600 pixels, a 1.6:1 height-to-width ratio, and require RGB colour mode. RGB is for screens. If your file is in CMYK (which is for print) it will render incorrectly as an ebook cover and needs to be reconverted.

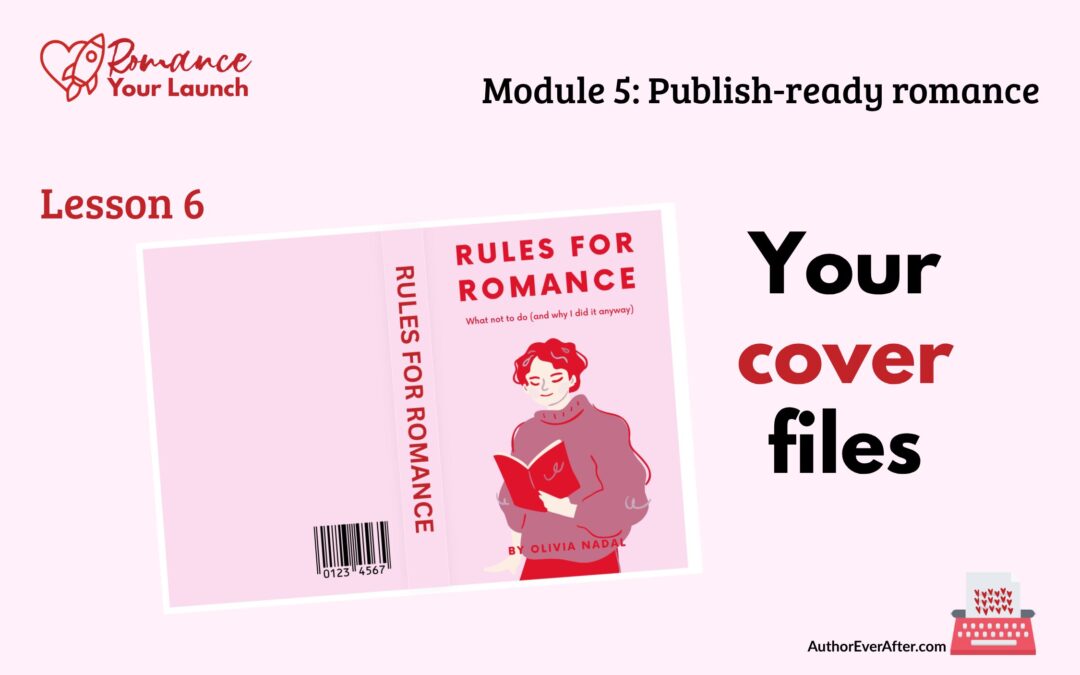
Your print cover is a single flat file that wraps around the entire physical book (front cover, spine, and back cover) as one continuous image, laid out to the exact dimensions of your specific trim size and page count, with bleed built into every edge. It’s a PDF.

The spine width is calculated from your page count and your chosen paper type, and if your page count changes after the cover was produced, the spine width changes too, which means the file needs to be updated before you upload.

These are two separate deliverables from your cover designer. If you received only one file, you’re missing something.

What you should have received

When your cover designer delivers your files, here’s what a complete delivery looks like.

For your ebook, you need a high-resolution JPG of your front cover sized to at least 2560 x 1600 pixels, with a 1.6:1 aspect ratio and saved in RGB colour mode. These are the ebook cover size requirements for both KDP and IngramSpark, and there’s no wiggle room on them.

For your KDP print cover, you need a full print wrap PDF built to KDP’s specifications for your specific trim size and page count, with 0.125 inches of bleed on all outer edges. These are the print cover file requirements for KDP, and they differ from IngramSpark in ways that matter.

For your IngramSpark print cover, you need a separate print wrap PDF, specifically a PDF/X-1a file (a particular PDF standard) built to IngramSpark’s specifications and saved in CMYK colour mode. This is the most significant KDP and IngramSpark cover difference: IngramSpark requires CMYK for print, and a file created in RGB and converted to CMYK will often show colour shifts, sometimes significant ones. If your cover was designed in RGB, it needs to be properly converted for IngramSpark, and you should order a proof copy to confirm the colours printed the way you expected.

It’s also worth asking your designer about source files before your project closes. You don’t need them to publish, but having the working Illustrator or Photoshop files means that if your page count changes or you want to update cover elements in the future, you or a new designer can make changes without starting from scratch—assuming your cover deigner will allow this use! Some do not.

The spine width problem

Spine width is the measurement that causes the most problems in print cover production, because it changes with your page count. A spine that’s even slightly too wide or too narrow will either fail IngramSpark’s automated check or print with the spine text shifted onto the front or back cover.

Spine width is calculated from three variables:

  1. your final page count,
  2. your paper type (white and cream paper have different thickness), and
  3. your trim size.

Both KDP and IngramSpark provide spine width calculators, and your cover designer should be using these to produce your files.

What this means for you practically: finalise your interior formatting and confirm your exact final page count before your designer produces your print wrap files. If anything changes in your interior after the cover is produced (even by a few pages), tell your designer immediately so the spine width can be recalculated.

How to check your files before you upload

Once you have your files in hand, do these checks before anything goes to a platform. This is your how-to-check-cover-files-before-uploading process, and it takes less time than fixing a problem after the fact.

Start with a visual inspection of every file.

Open each one. This sounds obvious, but a surprising number of authors upload files they’ve never actually opened on their own computer. For your ebook JPG, open it in any image viewer and check that the title, author name, and series information are spelled correctly, then zoom out to thumbnail size and confirm the text is legible. Your ebook cover will be seen most often at roughly the size of a postage stamp in search results and category browsing. Text that looks fine at full size can become completely illegible at thumbnail size. Step back from your screen and squint. If you can’t read the title from across the room, a reader scrolling through search results can’t either.

For your print wrap PDFs,

open each file and zoom in on the spine to confirm your title and author name are correct and fully visible within the spine area. Check the front cover for correct title, author name, series, and any tagline. Check the back cover for correct blurb text, your website URL, and the barcode placement area. Look at the outer edges to confirm the bleed extends beyond the trim line, and check that no important text or design elements are sitting too close to the trim edge. There should be a clear safety margin of at least 0.25 inches between any critical content and the trim line.

Confirm your page count is final before you upload any print cover.

Your print wrap files are sized to your exact page count. If that number changed at any point after your cover was produced, contact your designer before you upload anything.

Use the platform’s previewer during upload.

Both KDP and IngramSpark have cover preview tools built into their title setup process. KDP’s previewer shows you how your cover will appear on the product page and in search results. IngramSpark’s previewer will flag technical errors (wrong colour mode, missing bleed, incorrect dimensions) before you submit. Don’t skip this step. It exists specifically to catch problems before they become expensive.

Order a physical proof before you approve print distribution.

Colours shift between screen and print. What looks vibrant on your monitor can look muted or dark in your hands. What reads as a rich burgundy on screen can print as brown. The only way to know what your cover actually looks like in the reader’s hands is to hold a copy of it.

This matters most for covers with dark backgrounds, gradients, subtle colour variation, or gold and metallic effects, which often don’t translate well to standard print-on-demand. If the proof doesn’t match your expectations, talk to your designer about adjusting the CMYK values and order a second proof before you approve.

🇹🇩 A note for Canadians:

If you order a proof copy from IngramSpark, be aware that they will print in a facility in the USA. In May, 2026, that means when the book hits the Canadian border there is a very high liklihood that you will be charged a tariff. Friends have paid $10 extra due to this fee (which also includes a handling charge.)

File naming and storage

Before you upload anything, name your cover files clearly and store them somewhere organised. You’ll need these files again: when you update your book, when you set up profiles on BookBub or Goodreads, when you run ads, when you produce a new edition.

A simple naming convention that works well is:

BookTitle_AuthorName_FileType_Platform_Date.

So:

  • ClosingTime_DanikaBloom_EbookCover_KDP_2026-05-30.jpg, and
  • ClosingTime_DanikaBloom_PrintWrap_IngramSpark_2026-05-30.pdf.

Store your files in at least two places (a cloud folder and a local backup) and keep the original files as delivered by your designer, unchanged, alongside any revised versions clearly labelled with the revision date and reason.

If something is wrong

If you discover a problem (wrong spine width, wrong colour mode, missing bleed, a typo), contact your cover designer and be specific. Don’t just say “something looks wrong.” Tell them exactly what the issue is, which file it’s in, and what platform flagged it or what you noticed in your review. The more specific you are, the faster the correction happens.

If your designer is no longer available, another cover designer can usually open source files and make technical corrections. Spine width adjustments in particular are often a quick, inexpensive fix that doesn’t require redesigning anything. Both KDP and IngramSpark have template tools that can help you or a new designer rebuild the file to the correct book cover file specs if needed.

One more thing worth knowing: if you update your cover after publication, the change propagates to future purchases but not to copies already on readers’ devices. On KDP, cover updates are free and typically propagate within a few days. On IngramSpark, cover updates incur a revision fee, worth knowing if you’re ever planning a series rebrand across multiple titles.

What ready actually looks like

Your cover files are ready to upload when:

  • You have every file you need for every platform you’re publishing on
  • Every file has been visually inspected and confirmed correct
  • Your print wrap files match your final page count
  • Your ebook cover meets KDP’s ebook cover size requirements (2560 x 1600 pixels, RGB, JPG)
  • Your IngramSpark print wrap is PDF/X-1a in CMYK colour mode
  • Your files are named clearly and stored in at least two places

When that’s true, you’re ready for the upload lessons that follow, and the cover that drew your reader in from across a digital room will look exactly the way it should when she finds it.

Key takeaway

Getting your book cover file specs right before you upload is not the most glamorous part of self-publishing. But a cover file that fails a platform’s technical requirements, or prints in colours that don’t match what your reader saw online, undermines everything your cover was designed to do. Knowing the ebook cover size requirements, the KDP and IngramSpark cover file differences, and how to check cover files before uploading means your beautiful cover arrives in your reader’s hands looking exactly as intended, every time.

Join Author Ever After

You’ll get immediate and full access to the Romance Your Launch program (all 11 modules), a worksheet for every lesson, plus three weekly, small group support meetings to answer all your questions, and a freaking amazing community of pre-published and early career romance authors who are building their indie publishing careers alongside you.

Get more details about the community here.

Or, go straight to the application form.

Get every lesson in the Romance Your Launch course

—> Click this link and I’ll send you two to three lessons a week, starting with Lesson 1.

—>Or, join my regular email list if you’d rather just pick up from the current lesson.

This lesson is part of Module 5: Publish-ready romance in the Romance Your Launch program.

5.6 Book cover file specs for self-publishing authors

5.6 Book cover file specs for self-publishing authors

Book cover file specs for self-publishing authors Your cover designer has delivered your files. They're beautiful. You love them. You're ready to upload and get this book into the world. Understanding book cover file specs for self-publishing is the one thing standing...
5.5 Formatting check before you publish your romance novel

5.5 Formatting check before you publish your romance novel

Your cover is beautiful. But a stunning cover file that fails a platform’s technical requirements can mean reprints, rejected uploads, or colours that shift dramatically between screen and print. Here’s how to get your book cover file specs right before anything goes live.

5.4 How to format a romance novel for self-publishing

5.4 How to format a romance novel for self-publishing

Good formatting is invisible. Bad formatting costs you reviews you didn’t see coming. Here’s how to format a romance novel for self-publishing so your pages disappear and your readers stay in the story.

5.3 Romance book cover design guide for indie authors

5.3 Romance book cover design guide for indie authors

Your feelings about what looks beautiful are almost beside the point. A romance cover is a signal, not self-expression. This romance book cover design guide shows you exactly what that signal needs to say and how to say it.

5.2 ISBNs for self-published authors: what you need to know

5.2 ISBNs for self-published authors: what you need to know

Before you upload your manuscript anywhere, you need to make one decision that affects every version of your book and every platform it lives on. Here’s what to know about ISBNs for self-published authors before you hit publish.

5.1 Romance novel metadata tips for self-published authors

5.1 Romance novel metadata tips for self-published authors

Your book deserves to be found. But even a great romance novel stays invisible if your metadata isn’t doing its job. These romance novel metadata tips for self-published authors will help you get it right before you hit publish.

4.6 Final manuscript review before publishing your romance

4.6 Final manuscript review before publishing your romance

“Almost there” is where a lot of authors stall out. In this lesson, you’ll walk through a final manuscript review before publishing so you can read like a reader, catch small issues that break immersion, and finally feel confident calling your romance done.

4.5 Line edit for a romance novel that feels polished

4.5 Line edit for a romance novel that feels polished

The line edit is where your romance stops feeling like a draft and starts feeling like a book. In this lesson, you’ll learn how to make your sentences clearer, sharper, and more intentional—without turning your voice into bland, beige prose.

4.4 Scene level edit for a romance novel that hits harder

4.4 Scene level edit for a romance novel that hits harder

Scene level edit for a romance novel that readers actually feel The structural edit asked whether your story works; the scene level edit for a romance novel asks whether your story feels. You've fixed the bones: the romance arc is present, the beats are in the right...

4.3 Structural edit for a romance novel that actually works

4.3 Structural edit for a romance novel that actually works

A structural edit is where you stop fussing over sentences and zoom all the way out to your romance as a whole. In this lesson, you’ll learn how to read your draft for structure, map the romance arc, and spot the big changes that will make everything you revise next actually worth the effort.

4.2 Beta readers for romance authors who want better books

4.2 Beta readers for romance authors who want better books

Before you sink weeks into polishing sentences, you need to know if the story actually works for anyone who isn’t you. In this lesson, you’ll learn how to find and brief beta readers for romance authors so you get targeted, story-level feedback that makes revision easier instead of overwhelming.

4.1 Self-editing tips for romance authors who want readers

4.1 Self-editing tips for romance authors who want readers

Self-editing is not a punishment for an imperfect draft; it’s how you give your romance a second life with a clearer head and a sharper eye. In this lesson, you’ll set yourself up with mindset, tools, and support so your edits actually help you reach more readers.

3.5 Social media strategy for romance authors

3.5 Social media strategy for romance authors

You do not need to be everywhere online to sell romance. In this lesson, you’ll choose one platform, decide what you actually want social media to do for your career, and build a sustainable posting rhythm that turns curiosity into clicks on your lead magnet.

3.4 Simple romance author websites

3.4 Simple romance author websites

Your author website doesn’t have to impress anyone. It has to exist and give readers one clear place to go. In this lesson, you’ll pick an easy platform, claim your URL, write your copy, and build a simple, on‑brand home that points straight to your books and your list.

3.3 Email list setup for romance authors

3.3 Email list setup for romance authors

Followers belong to the platform. Your list belongs to you. In this lesson, you’ll connect your lead magnet to a clean email setup and draft a four‑email welcome sequence so every new romance reader is welcomed, warmed up, and ready when you launch your book.

Need to go back to a previous lesson?

Return to Module 5: Publish-ready romance to see all six lessons. 

Or go back to the Romance Your Launch home page to see all the modules and links to their hub pages.

Want the next lesson in your inbox?

This post is part of the Romance Your Launch series—a lesson-by-lesson guide to self-publishing your romance novel, written for pre-published and early career romance authors. 

.

—> Click this link, drop in your name and email address, and I’ll send you two to three lessons a week, starting with Lesson 1.

.

—> If you’d rather just pick up where the series is, join my regular email list from this link. 

5.5 Formatting check before you publish your romance novel

5.5 Formatting check before you publish your romance novel

Formatting check before you publish your romance novel

You’ve been through structural edits, scene-level revisions, and a line edit. Your story is solid. Your sentences are clean. You’ve read this manuscript so many times that you could recite whole scenes from memory. And yet, there’s one more read it needs before it goes anywhere near an upload screen.

Not for story. Not for grammar. Not for anything your editor was looking for.

This read is specifically for formatting, and doing a thorough formatting check before you publish your romance novel is one of the most skipped steps in the entire self-publishing process. Authors who skip it often find out why they shouldn’t have when a reader emails to say there’s a blank page in the middle of chapter seven, or a review mentions that the chapter headers are inconsistent, or they notice themselves (after publication) that the dedication page is in a completely different font from everything else.

A formatting beta read catches those things first. It takes one careful reader and a clear brief. And it’s the right thing to do before you upload a single file.

What a formatting beta read actually is

A formatting beta read is a targeted, functional read of your fully formatted manuscript (your actual EPUB or PDF file, not your Word document) by someone who is specifically looking for formatting problems rather than story problems. Think of it as your ebook formatting checklist brought to life by a human being with fresh eyes and no emotional attachment to your story.

The distinction matters more than it might seem. A story beta reader is reading for plot, pacing, character, and emotional resonance. A formatting beta reader is reading the way a quality control inspector reads: methodically, with their eyes on the structure of the document rather than the content of the story. These are two completely different jobs that call for two completely different headspaces. You can ask the same person to do both, but not at the same time. If you’re asking someone to be your formatting beta reader, brief them clearly so they understand that story feedback, while welcome, is not the purpose of this read.

Why your own eyes aren’t enough

When you read your manuscript in your writing or editing software, you’re looking at a version of the document that is not what readers will experience. Your formatter (whether that’s you or a professional you hired) takes your manuscript and transforms it into an EPUB for ebook readers and a PDF for print. Things can go wrong in that transformation that are completely invisible in the source document. That’s exactly why a self-publishing quality check on the actual output files matters so much.

A misplaced page break can push a chapter opening onto a blank page. A scene break symbol that looked fine in Word can disappear entirely in EPUB. A font that was embedded correctly can render strangely on certain Kindle devices. A print PDF can have margins that are technically within spec but feel uncomfortably tight on the physical page. A running header that says “Chapter Eight” can sit above what is clearly Chapter Nine because a template was copied and one line was missed.

None of these things will be caught by your proofreader, who read the manuscript before it was formatted. None will be caught by Amazon’s upload system, which checks for technical compliance, not whether your chapter numbers are correct. And none will be caught by you, because you have read this document so many times that your brain autocorrects everything it sees.

They will be caught by a fresh pair of eyes reading the actual formatted file. That’s the whole point of this step.

What your formatting beta reader is looking for

When you brief your formatting beta reader, give them a clear checklist and ask them to note the location or page number of anything they find, not to fix it, just to flag it and move on. The worksheet for this lesson includes the full ebook formatting checklist to send them. Here’s what it covers.

For the ebook file, they’re checking:

  • Chapter headers are consistent in font, size, and style throughout
  • Chapter numbers match the actual chapter sequence
  • Each new chapter starts cleanly on a fresh screen
  • Scene break symbols are consistent and haven’t rendered as strange characters or disappeared entirely
  • Table of contents links (if included) work and go to the right places
  • Back matter links (to your newsletter, website, next book) are working and go where they’re supposed to
  • Text reflows correctly when a reader changes the font size on their device

For the print PDF, they’re checking:

  • Margins feel comfortable and text isn’t running dangerously close to the spine or the trim edge
  • All chapters start on a new page with consistent header styling
  • Running headers and page numbers are correct throughout and correctly absent from front matter pages
  • Scene break symbols are consistent and correctly positioned
  • Any graphic elements (chapter ornaments, maps, illustrations) are sharp and sitting within the safe zone

Both lists sound long written out. In practice, a careful reader can easily move through a formatted romance novel in two thours or less with this brief in hand. It’s a fast read because they’re skimming for problems rather than reading for pleasure. This is not a full proofread-the-formatted-book situation. It’s a structural and visual check, nothing more.

Who should do this read

Your formatting beta reader needs three things: fresh eyes on the document, access to an actual e-reader or reading app for the EPUB file, and the willingness to read methodically rather than get pulled into the story.

Good candidates include:

  • A trusted author friend who writes in your sub-genre and understands what a clean self-publishing quality check looks like in practice
  • An Author Ever After community member willing to swap formatting beta reads with you (an easy ask, and one that benefits both of you)
  • A detail-oriented reader from your ARC team who you trust to work through an ebook formatting checklist carefully

If you hired a professional formatter, it’s entirely reasonable to ask them to confirm they’ve done a final quality check on the delivered files before handing them over. Most do this as a matter of course, but asking explicitly is not an unreasonable request.

What you want to avoid is asking someone who loves your writing so much that they’ll get absorbed in the story and forget to notice that chapter twelve has the wrong header. That person is a gift as an ARC reader. They are not the right person for this job.

How to send the files

Send your formatting beta reader the actual output files: the EPUB for the ebook read, and the PDF for the print read. Not a Word document. Not a Google Doc. The whole point of doing a formatting check before you publish your romance novel is to catch problems that only appear in the formatted file, and those problems are invisible in the source.

For the ebook, ask them to load it onto an actual e-reader device if they have one, not just a desktop app. Some formatting issues only surface on specific devices, and a Kindle and a phone app can render the same file differently. If they can check both, that’s better. This is especially important for the items on your ebook formatting checklist that relate to text reflow and scene break rendering, since those behave differently across devices.

For the print PDF, ask them to read it at 100% zoom: the actual print size rather than zoomed in or out. Margin and spacing issues that are invisible at 150% are very visible at actual size.

Give them a specific deadline that leaves you time to act on what they find before your upload date. A week is usually enough. This is a faster read than a story beta because they’re working through a checklist, not living in the experience.

Acting on the feedback

When the notes come back, fix everything on the list, or make a deliberate, conscious decision not to fix something and know why. A slightly inconsistent scene break symbol that you barely notice is exactly the kind of thing a reader might mention in a review. A back matter link that goes to a 404 page is a list-building opportunity you’ll never recover. Neither of those things has anything to do with your story quality, but both affect how professional your book feels to the person reading it.

What a self-publishing quality check is really protecting isn’t your manuscript. It’s your reader’s experience of it.

Once the fixes are in, do a quick final check yourself: open the corrected file, navigate to each flagged location, and confirm the fix is there. When you’re satisfied the file is clean, you’re ready for Lesson 5.6, where we’ll talk about the cover files that need to be checked and prepared before anything gets uploaded.

Key takeaway

A formatting check before you publish your romance novel isn’t a perfectionist move. It’s a practical one. The formatting issues that slip through to readers are almost never story problems. They’re invisible-in-the-source-file problems that a fresh pair of eyes with a clear ebook formatting checklist will catch in a few hours. Brief your reader well, send the actual formatted files, give yourself enough time to act on what they find, and treat this as the self-publishing quality check it is. Your readers will never know you did this. That’s exactly the point.

Join Author Ever After

You’ll get immediate and full access to the Romance Your Launch program (all 11 modules), a worksheet for every lesson, plus three weekly, small group support meetings to answer all your questions, and a freaking amazing community of pre-published and early career romance authors who are building their indie publishing careers alongside you.

Get more details about the community here.

Or, go straight to the application form.

Get every lesson in the Romance Your Launch course

—> Click this link and I’ll send you two to three lessons a week, starting with Lesson 1.

—>Or, join my regular email list if you’d rather just pick up from the current lesson.

This lesson is part of Module 5: Publish-ready romance in the Romance Your Launch program.

5.6 Book cover file specs for self-publishing authors
5.6 Book cover file specs for self-publishing authors

Book cover file specs for self-publishing authors Your cover designer has delivered your files. They're beautiful. You love them. You're ready to upload and get this book into the world. Understanding book cover file specs for self-publishing is the one thing standing...

5.5 Formatting check before you publish your romance novel

5.5 Formatting check before you publish your romance novel

Your cover is beautiful. But a stunning cover file that fails a platform’s technical requirements can mean reprints, rejected uploads, or colours that shift dramatically between screen and print. Here’s how to get your book cover file specs right before anything goes live.
5.4 How to format a romance novel for self-publishing

5.4 How to format a romance novel for self-publishing

Good formatting is invisible. Bad formatting costs you reviews you didn’t see coming. Here’s how to format a romance novel for self-publishing so your pages disappear and your readers stay in the story.
5.3 Romance book cover design guide for indie authors

5.3 Romance book cover design guide for indie authors

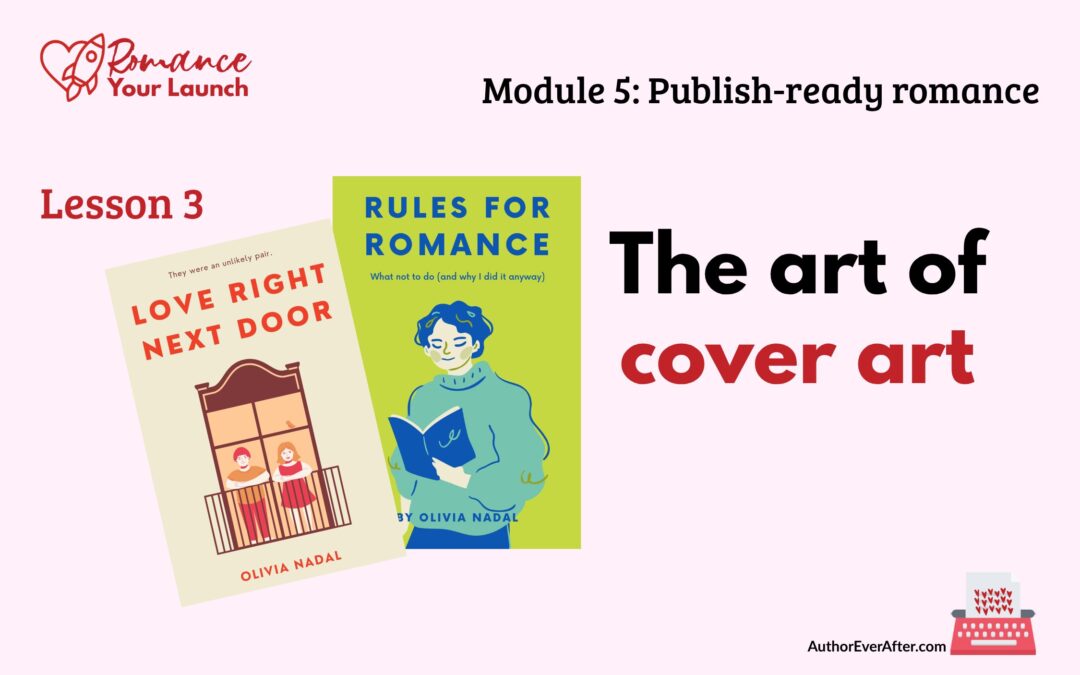
Your feelings about what looks beautiful are almost beside the point. A romance cover is a signal, not self-expression. This romance book cover design guide shows you exactly what that signal needs to say and how to say it.

5.2 ISBNs for self-published authors: what you need to know

5.2 ISBNs for self-published authors: what you need to know

Before you upload your manuscript anywhere, you need to make one decision that affects every version of your book and every platform it lives on. Here’s what to know about ISBNs for self-published authors before you hit publish.

5.1 Romance novel metadata tips for self-published authors

5.1 Romance novel metadata tips for self-published authors

Your book deserves to be found. But even a great romance novel stays invisible if your metadata isn’t doing its job. These romance novel metadata tips for self-published authors will help you get it right before you hit publish.
4.6 Final manuscript review before publishing your romance

4.6 Final manuscript review before publishing your romance

“Almost there” is where a lot of authors stall out. In this lesson, you’ll walk through a final manuscript review before publishing so you can read like a reader, catch small issues that break immersion, and finally feel confident calling your romance done.

4.5 Line edit for a romance novel that feels polished

4.5 Line edit for a romance novel that feels polished

The line edit is where your romance stops feeling like a draft and starts feeling like a book. In this lesson, you’ll learn how to make your sentences clearer, sharper, and more intentional—without turning your voice into bland, beige prose.
4.4 Scene level edit for a romance novel that hits harder

4.4 Scene level edit for a romance novel that hits harder

Scene level edit for a romance novel that readers actually feel The structural edit asked whether your story works; the scene level edit for a romance novel asks whether your story feels. You've fixed the bones: the romance arc is present, the beats are in the right...

4.3 Structural edit for a romance novel that actually works

4.3 Structural edit for a romance novel that actually works

A structural edit is where you stop fussing over sentences and zoom all the way out to your romance as a whole. In this lesson, you’ll learn how to read your draft for structure, map the romance arc, and spot the big changes that will make everything you revise next actually worth the effort.

4.2 Beta readers for romance authors who want better books

4.2 Beta readers for romance authors who want better books

Before you sink weeks into polishing sentences, you need to know if the story actually works for anyone who isn’t you. In this lesson, you’ll learn how to find and brief beta readers for romance authors so you get targeted, story-level feedback that makes revision easier instead of overwhelming.
4.1 Self-editing tips for romance authors who want readers

4.1 Self-editing tips for romance authors who want readers

Self-editing is not a punishment for an imperfect draft; it’s how you give your romance a second life with a clearer head and a sharper eye. In this lesson, you’ll set yourself up with mindset, tools, and support so your edits actually help you reach more readers.
3.5 Social media strategy for romance authors

3.5 Social media strategy for romance authors

You do not need to be everywhere online to sell romance. In this lesson, you’ll choose one platform, decide what you actually want social media to do for your career, and build a sustainable posting rhythm that turns curiosity into clicks on your lead magnet.
3.4 Simple romance author websites

3.4 Simple romance author websites

Your author website doesn’t have to impress anyone. It has to exist and give readers one clear place to go. In this lesson, you’ll pick an easy platform, claim your URL, write your copy, and build a simple, on‑brand home that points straight to your books and your list.
3.3 Email list setup for romance authors

3.3 Email list setup for romance authors

Followers belong to the platform. Your list belongs to you. In this lesson, you’ll connect your lead magnet to a clean email setup and draft a four‑email welcome sequence so every new romance reader is welcomed, warmed up, and ready when you launch your book.

Need to go back to a previous lesson?

Return to Module 5: Publish-ready romance to see all six lessons. 

Or go back to the Romance Your Launch home page to see all the modules and links to their hub pages.

Want the next lesson in your inbox?

This post is part of the Romance Your Launch series—a lesson-by-lesson guide to self-publishing your romance novel, written for pre-published and early career romance authors. 

.

—> Click this link, drop in your name and email address, and I’ll send you two to three lessons a week, starting with Lesson 1.

.

—> If you’d rather just pick up where the series is, join my regular email list from this link. 
5.4 How to format a romance novel for self-publishing

5.4 How to format a romance novel for self-publishing

How to format a romance novel for self-publishing

Here’s something most readers never consciously notice: the formatting.

And that’s exactly the point. When you know how to format a romance novel and you get it right, the pages sort of disappear. The reader stops seeing fonts and margins and scene breaks and sinks into the story instead. The formatting has done its job precisely because it’s invisible.

When it’s not done well, readers notice, and not always in ways they can name. Something feels off. The book feels less professional than the last one they read. A vague doubt creeps in about whether the author knows what they’re doing, and that doubt colours everything that follows, including the review they leave at the end.

Professional formatting is invisible marketing. It’s the signal, sent on every single page, that you respect your reader’s time and attention enough to get this right. This lesson is about understanding what “right” actually looks like for romance novel formatting, and making the decisions you need to make before you sit down to format or hand your manuscript to someone who will.

Decide your formats before you touch any tools

The first decision isn’t a design decision. It’s a publishing strategy decision: which formats will this book exist in?

Ebook is the baseline for almost every indie romance author, and for good reason. Digital sales dominate the romance market, and ebook formatting for self-published authors is the most straightforward place to start. But paperback is worth serious consideration, not just because some readers strongly prefer print, but because a paperback gives your book a physical presence in the world. It shows up in shelfies. It gets gifted. It can be ordered through Ingram by libraries and independent bookstores in ways an ebook simply can’t.

Beyond ebook and paperback, your options expand to hardcover, large print, and special editions with premium touches like sprayed edges or alternate covers. Each additional format increases your upfront workload and costs: more ISBNs, more files to prepare and maintain, more proofs to order. Each one also increases your perceived professionalism and, in some cases, opens distribution channels you wouldn’t otherwise have access to.

The right starting lineup is the one that matches your readers and your resources. Look at what your bestselling comp authors are doing: ebook only, ebook plus paperback at launch, large print added later? Let that inform your decision rather than making it in the abstract. You’re not committing to every possible version on day one. You’re picking a sane starting point you can execute well.

Choose your tools thoughtfully

Your goal is professional-looking interiors without learning software built for design professionals. For most romance novels, that’s entirely achievable with tools designed specifically for book interior formatting.

The two options most indie romance authors settle on are Vellum (Mac-only, produces beautiful results with relatively little effort. And you can try it before you buy with my link above) and Atticus (cross-platform, handles both ebook and print from a single interface, and at $147 is the more budget-friendly option). Both include book-safe fonts, both have templates that suit romance novel formatting, and both have enough of a user community that you can find answers to most questions without much hunting. Kindle Create is a free option worth knowing about for ebook formatting for self-published authors who are only producing a digital edition, though it has real limitations for print.

In early 2026, a new design software has been making waves. It was created by Canva and is totally free. It’s called Affinity and one formatter I know, Sarah Neeson, has been using it enough to know that once her InDesign subscription expires she won’t be renewing since Affinity is doing everything she needs it to for her own books and her clients’. 

One thing worth knowing before you choose: if you plan to publish more than one romance novel (and the assumption here is that you do), invest in software that handles both ebook and print from the outset. The free or ebook-only options will save you money once and cost you time repeatedly. Give yourself a learning window before your upload deadline too. Formatting software has a modest learning curve, and you don’t want to meet it the night before you planned to publish.

Print decisions: trim size and page count

For your paperback romance novel formatting, you’ll need to choose a trim size: the physical dimensions of the finished book. This affects how your book looks on a shelf, how it feels in a reader’s hands, and how your page count lands at a given word count.

The most common trim sizes for romance are 5 x 8, 5.25 x 8, and 5.5 x 8.5. Shorter books tend to look better at smaller trim sizes, where the spine has enough width to carry your title and author name legibly. Longer books have more flexibility, and a slightly larger trim can keep a 100,000-word novel from becoming unwieldy. 

The practical move before you finalise your trim size is to check your comp authors’ paperbacks. Hold one if you can, or look at the dimensions listed on their Amazon page. You want your book to feel like it belongs in the same physical space as the books your readers already own. When you format a romance novel for self-publishing in print, this kind of hands-on research is worth more than any spec sheet.

Style your interior

Interior styling covers your body font, chapter headings, scene breaks, margins, line spacing, headers and footers, page numbers, and any embellishments like drop caps or ornamental dividers. These decisions work together to create the reading experience your pages deliver, and they should feel like a natural fit for your sub-genre and tone. This is where romance novel formatting tips move from technical into intentional.

For body text in print, serif fonts are the traditional choice because the small strokes at the ends of letterforms help the eye track across a line of text. Options like Garamond, Crimson Pro, EB Garamond, and Baskerville-style fonts are all readable and familiar to romance readers without calling attention to themselves. For ebook formatting for self-published authors, both serif and clean sans-serif can work well. What matters most is clarity at different screen sizes and on different devices.

One thing worth checking regardless of which fonts you use: licensing.

Many fonts that appear in design tools are free for personal use but not for commercial publication. Formatting software like Atticus and Vellum include fonts that are cleared for book use. If you bring in anything additional, verify the license before you publish.

Headers, footers, and page numbers seem like minor details until you see them done inconsistently across a series and realise how much quiet credibility that inconsistency costs. Decide where your book title, author name, and page numbers will sit, and build those decisions into your formatting template so they carry through automatically. The convention is to omit headers and footers from the title page, copyright page, and chapter opening pages. Consistency everywhere else is non-negotiable.

Embellishments (drop caps at chapter openings, ornamental scene dividers, illustrated chapter headers r even full pages) can add real polish when they fit the tone of the book. A cozy small-town romance might carry a tiny floral divider beautifully. A dark romance probably doesn’t. The guiding principle is that every decorative choice should feel like it belongs in this specific book, not like it was borrowed from a template without thinking.

The case for an elevated table of contents

Most fiction authors treat the table of contents as a formality: Chapter One, Chapter Two, Chapter Three, all the way to the end. Technically correct. Completely forgettable.

There’s another approach, and romance readers love it.

An elevated table of contents gives every chapter a title instead of (or in addition to) a number, and those titles do actual work. They can tease what’s coming without spoiling it, set the emotional tone of a scene before a reader gets there, wink at a trope, or carry a thematic thread through the whole book. Done well, a table of contents becomes part of the reading experience rather than a navigation tool the reader skips past.

This matters more than it used to, because ebook tables of contents are now interactive. Readers browse them before they buy. A reader skimming the sample of your book on Amazon can click into your table of contents and read every chapter title before she’s committed a penny. If those titles are intriguing, funny, romantic, or tonally on-point for your sub-genre, they’re doing pre-sale marketing work for you.

Two examples of this done well

In my book, The Billionaire’s Shrubbery, every chapter title names the POV character and then delivers a plant-forward pun (for the heroine) or pop culture riff (for the hero) that signals the emotional tone before the reader reads a single word.

Virginia — Bonsai Bonanza.
Will — Sleepless in Seattle and L.A. and Vancouver.
Virginia — Angel Wings Meet the Devil.
Will — The Beard and the Beautiful.

A reader browsing the table of contents gets the dual POV structure immediately, picks up the book’s light, punny tone, and gets a teaser of each scene’s energy, all before Chapter One. That’s a lot of work for a few words.

A different approach shows up in Defy the Stars by Daphne Pond, a contemporary Romeo and Juliet reimagining that uses quotes from the play as chapter titles:

Enter Juliet,
Two Households,
Both Alike in Dignity,
Mad Blood Stirring,
I Defy You Stars.

Every title pulls double duty. It signals the emotional register of the chapter while reinforcing the thematic throughline of the whole book. A reader browsing the table of contents before buying gets the tone, the literary sensibility, and a taste of what kind of romance this is, all before Chapter One.

Two different books, two different approaches, one shared result: a table of contents that engages a reader right off teh hop which (we hope) will make them more likely to buy.

How to do this in your formatting software

In both Vellum and Atticus, adding chapter titles is straightforward. Instead of labelling your chapters numerically only, you add a subtitle or title field to each chapter heading.

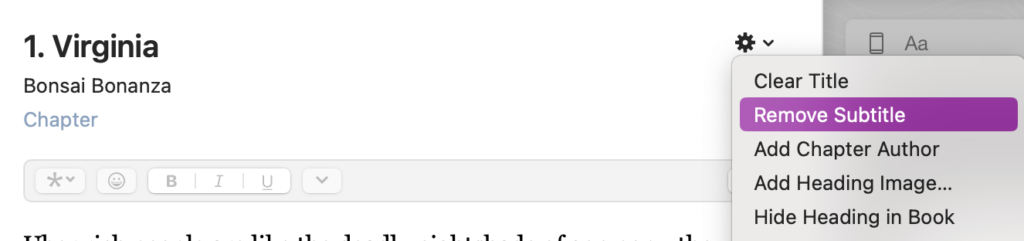
Vellum calls this the “Chapter Subtitle” field. It’s a two-step process.

Step 1:

Vellum formatting software showing chapter heading

In Vellum, click the gear icon on any chapter heading to add or remove a subtitle. That subtitle becomes your chapter title in the table of contents. Since I already have subtitles, mine says Remove Subtitle. When you use it it will say Add Subtitle. You need to do this for each chapter.

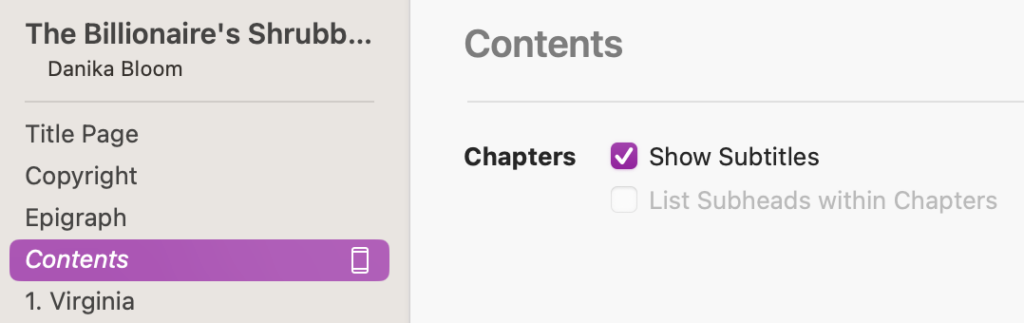
Step 2:

Vellum formatting software showing the Contents settings panel with

To make chapter subtitles appear in your ebook’s linked table of contents, select the Contents section and check “Show Subtitles” in the settings panel. You only need to do this once.

Atticus handles it through the chapter title settings in your style panel. I don’t use Atticus so I don’t have screenshots. Sorry.

Both will pull those titles into your linked table of contents automatically, so the clickable TOC your ebook reader sees reflects your full chapter titles, not just numbers.

For print, chapter titles appear on the chapter opening page, and your formatting software will carry them into the print TOC if you include one. Not all print romance novels include a TOC, but if yours does, elevated chapter titles make it worth including.

One practical note: if you’re going to use chapter titles, commit to them for the whole book. A table of contents that switches from evocative titles to “Chapter Fourteen” halfway through reads as unfinished, and readers will notice.

Front and back matter

You mapped out your metadata in Lesson 5.1. Now that metadata needs to be built into the formatted book itself, and the ebook and print versions handle it differently. This is one of the most practically important romance novel formatting tips, because the decisions you make here directly affect how readers experience (and act on) your back matter.

For print, front matter typically includes the title page, copyright page, and dedication if you have one. An epigraph, a content note, or a brief “also by” list can also live here. Print readers expect to flip through a few pages before the story starts, and there’s no penalty for it.

For ebook formatting, front matter is a different calculation entirely. Everything before Chapter One counts against your Read Sample preview percentage: the portion of your book Amazon shows to browsers who haven’t bought yet. Keep your ebook front matter lean. Title page, copyright, and dedication if you have one. Move your acknowledgements, your full “also by” list, and anything non-essential to the back. You want a browser’s preview to spend as much time as possible in Chapter One, not in your copyright notice.

Back matter is where some of the most valuable reader relationship work happens, and it’s where a lot of indie authors leave real opportunity on the table. The moment right after a reader finishes your book (when she’s emotionally satisfied and primed to want more) is the single best moment to ask for the next thing. The most strategic call to action is to get her to sign up for your email list to get a bonus epilogue. Alternately, you could have her click through to the first chapter of the next book in the series, or follow you somewhere she’ll see you regularly. Every page after “The End” should either deepen the relationship or guide her toward the next book. If a page is doing neither, it probably doesn’t need to be there.

Proof and test before you upload

Formatted files need to be tested before they go live, and testing means actually reading them in the format a reader will experience, not just scrolling through the source file looking for obvious errors. This step applies whether you’re handling the book interior formatting yourself or working with a professional.

For your ebook, load the file onto at least one reading app and, if possible, more than one device. Check that the table of contents jumps to the right places, that scene breaks appear correctly at different screen sizes, and that every link in your back matter actually works. Broken links in back matter are one of the most common and most costly formatting errors indie authors make, because they’re invisible in the source file and only reveal themselves when a reader tries to click through.

For your paperback, always order a physical proof before you publish. Looking at a print-ready PDF on screen is not the same as holding the finished book. You’re checking that your inner margins are wide enough that text doesn’t disappear into the spine, that chapter openings and headers behave correctly throughout, and that the overall print quality is what you expected. Different print-on-demand machines have different tolerances, and a setting that looks correct in your file can translate slightly differently in the finished product. The proof is your last chance to catch that before your readers do.

What you’re deciding in this lesson

By the time you finish this lesson (and the accompanying worksheet if you’re in the Author Ever After community), you won’t have a formatted book. What you’ll have is every decision made so that formatting a romance novel for self-publishing (whether you do it yourself or hand it to someone else) is a focused execution rather than an ongoing series of choices made under pressure.

That’s the difference between book interior formatting that gets done once, cleanly, and formatting that gets done three times with two extra upload rounds and a proof you’re not quite happy with.

Key takeaway

Formatting decisions feel like a secondary concern right up until a reader leaves a review saying something felt “off” and you realise the issue wasn’t your story, it was your pages. Knowing how to format a romance novel for self-publishing means making every decision before you open the software: your formats, your tools, your trim size, your interior style choices, your front and back matter plan. Vellum vs Atticus vs Affinity, serif vs sans-serif, ebook front matter vs print front matter. These are all answerable questions once you know what you’re deciding and why. Make those decisions early, and the formatting itself becomes a straightforward execution rather than a stressful guessing game.

Join Author Ever After

You’ll get immediate and full access to the Romance Your Launch program (all 11 modules), a worksheet for every lesson, plus three weekly, small group support meetings to answer all your questions, and a freaking amazing community of pre-published and early career romance authors who are building their indie publishing careers alongside you.

Get more details about the community here.

Or, go straight to the application form.

Get every lesson in the Romance Your Launch course

—> Click this link and I’ll send you two to three lessons a week, starting with Lesson 1.

—>Or, join my regular email list if you’d rather just pick up from the current lesson.

This lesson is part of Module 5: Publish-ready romance in the Romance Your Launch program.

5.6 Book cover file specs for self-publishing authors

5.6 Book cover file specs for self-publishing authors

Book cover file specs for self-publishing authors Your cover designer has delivered your files. They're beautiful. You love them. You're ready to upload and get this book into the world. Understanding book cover file specs for self-publishing is the one thing standing...

5.5 Formatting check before you publish your romance novel

5.5 Formatting check before you publish your romance novel

Your cover is beautiful. But a stunning cover file that fails a platform’s technical requirements can mean reprints, rejected uploads, or colours that shift dramatically between screen and print. Here’s how to get your book cover file specs right before anything goes live.

5.4 How to format a romance novel for self-publishing

5.4 How to format a romance novel for self-publishing

Good formatting is invisible. Bad formatting costs you reviews you didn’t see coming. Here’s how to format a romance novel for self-publishing so your pages disappear and your readers stay in the story.

5.3 Romance book cover design guide for indie authors

5.3 Romance book cover design guide for indie authors

Your feelings about what looks beautiful are almost beside the point. A romance cover is a signal, not self-expression. This romance book cover design guide shows you exactly what that signal needs to say and how to say it.

5.2 ISBNs for self-published authors: what you need to know

5.2 ISBNs for self-published authors: what you need to know

Before you upload your manuscript anywhere, you need to make one decision that affects every version of your book and every platform it lives on. Here’s what to know about ISBNs for self-published authors before you hit publish.

5.1 Romance novel metadata tips for self-published authors

5.1 Romance novel metadata tips for self-published authors

Your book deserves to be found. But even a great romance novel stays invisible if your metadata isn’t doing its job. These romance novel metadata tips for self-published authors will help you get it right before you hit publish.

4.6 Final manuscript review before publishing your romance

4.6 Final manuscript review before publishing your romance

“Almost there” is where a lot of authors stall out. In this lesson, you’ll walk through a final manuscript review before publishing so you can read like a reader, catch small issues that break immersion, and finally feel confident calling your romance done.

4.5 Line edit for a romance novel that feels polished

4.5 Line edit for a romance novel that feels polished

The line edit is where your romance stops feeling like a draft and starts feeling like a book. In this lesson, you’ll learn how to make your sentences clearer, sharper, and more intentional—without turning your voice into bland, beige prose.

4.4 Scene level edit for a romance novel that hits harder

4.4 Scene level edit for a romance novel that hits harder

Scene level edit for a romance novel that readers actually feel The structural edit asked whether your story works; the scene level edit for a romance novel asks whether your story feels. You've fixed the bones: the romance arc is present, the beats are in the right...

4.3 Structural edit for a romance novel that actually works

4.3 Structural edit for a romance novel that actually works

A structural edit is where you stop fussing over sentences and zoom all the way out to your romance as a whole. In this lesson, you’ll learn how to read your draft for structure, map the romance arc, and spot the big changes that will make everything you revise next actually worth the effort.

4.2 Beta readers for romance authors who want better books

4.2 Beta readers for romance authors who want better books

Before you sink weeks into polishing sentences, you need to know if the story actually works for anyone who isn’t you. In this lesson, you’ll learn how to find and brief beta readers for romance authors so you get targeted, story-level feedback that makes revision easier instead of overwhelming.

4.1 Self-editing tips for romance authors who want readers

4.1 Self-editing tips for romance authors who want readers

Self-editing is not a punishment for an imperfect draft; it’s how you give your romance a second life with a clearer head and a sharper eye. In this lesson, you’ll set yourself up with mindset, tools, and support so your edits actually help you reach more readers.

3.5 Social media strategy for romance authors

3.5 Social media strategy for romance authors

You do not need to be everywhere online to sell romance. In this lesson, you’ll choose one platform, decide what you actually want social media to do for your career, and build a sustainable posting rhythm that turns curiosity into clicks on your lead magnet.

3.4 Simple romance author websites

3.4 Simple romance author websites

Your author website doesn’t have to impress anyone. It has to exist and give readers one clear place to go. In this lesson, you’ll pick an easy platform, claim your URL, write your copy, and build a simple, on‑brand home that points straight to your books and your list.

3.3 Email list setup for romance authors

3.3 Email list setup for romance authors

Followers belong to the platform. Your list belongs to you. In this lesson, you’ll connect your lead magnet to a clean email setup and draft a four‑email welcome sequence so every new romance reader is welcomed, warmed up, and ready when you launch your book.

Need to go back to a previous lesson?

Return to Module 5: Publish-ready romance to see all six lessons. 

Or go back to the Romance Your Launch home page to see all the modules and links to their hub pages.

Want the next lesson in your inbox?

This post is part of the Romance Your Launch series—a lesson-by-lesson guide to self-publishing your romance novel, written for pre-published and early career romance authors. 

.

—> Click this link, drop in your name and email address, and I’ll send you two to three lessons a week, starting with Lesson 1.

.

—> If you’d rather just pick up where the series is, join my regular email list from this link. 
5.3 Romance book cover design guide for indie authors

5.3 Romance book cover design guide for indie authors

Romance book cover design guide for indie authors

You probably don’t want to hear this, but your feelings about what looks good on a book cover are almost beside the point. That’s not a criticism of your taste. It’s just how genre fiction covers actually work. This romance book cover design guide for indie authors exists because a romance cover isn’t personal expression. It’s a signal. And in the half-second a reader spends glancing at a thumbnail on her phone screen, that signal either stops her scroll or it doesn’t.

If the cover answers her three unspoken questions correctly (what kind of romance is this, how spicy is it, and how is it going to make me feel), she slows down. If it doesn’t, she keeps scrolling and never knows your book existed.

This lesson is about learning to create a brief for a self-published romance cover that gets those answers right, whether you’re hiring a designer or doing it yourself.

Start with the shelf, not your feelings

Before you open Canva or email a designer, your first job is research. Not into what you find beautiful, but into what your sub-genre’s readers have already been trained to recognise and respond to. This is the foundation of any good romance book cover design guide, and it’s where most first-time authors either rush or skip entirely.

Go to Amazon and open the Top 100 in romance. Use the left sidebar to find your exact sub-genre. Pick a book that would be a comp for yours.

Then scroll down to the “Customers also bought or read” carousel and find a few more authors you want to sit beside. Screenshot or save anything that stops you, and start looking for patterns:

  • What’s the imagery style? Photographic couples, manchest models, illustrated characters, silhouettes, or setting-only covers?
  • What’s the colour palette, and does it shift depending on heat level or tone? (if you’re not sure, do the research to figure it out).
  • What do the fonts look like: script, block, serif?
  • How much skin is visible, and how close are the bodies?
  • What’s the overall emotional register: dark and moody, bright and playful, soft and cozy, sharp and intense?

You’re not copying any one cover. You’re learning the visual language your readers already speak fluently. They’ve bought hundreds of romances in this sub-genre. They know, without being able to articulate it, what a cover in this corner of the market looks like, and when a cover doesn’t match, something feels off even if they can’t say why. Your job is to understand that language well enough to speak it.

The worksheet walks you through this research systematically. Don’t skip it. Authors who skip this step are the ones who end up with a cover they love that their target readers scroll past without a second glance.

The three promises your cover must make

Once you’ve done your shelf research, you can start naming what your specific self-published romance cover needs to communicate.

Every romance cover makes three silent promises: sub-genre, heat level, and tone. These aren’t separate design decisions. They’re woven into every element of the cover simultaneously, which is why romance cover design tips always come back to the same starting point:

know your sub-genre conventions cold before you make a single design choice.

Sub-genre

is signalled through imagery style and setting cues. Small-town romcoms often lean toward illustrated art or bright, happy couple photos with warm colour palettes. Dark motorcycle club romance leans toward gritty photography, deep shadows, and high contrast. Paranormal romance reaches for otherworldly colour and symbolic imagery. Readers in each sub-genre have strong, intuitive responses to these cues. A cover that sends the wrong sub-genre signal will attract the wrong readers, and those readers will leave reviews saying the book wasn’t what they expected aka 1- and 2-star reviews.

Heat level

is signalled through how bodies are positioned, how much skin is visible, how suggestive the posing and expressions are, and how close the characters are to each other. A closed-door romance signals its heat level through softer imagery, more distance between characters, and emphasis on setting or mood rather than bodies. A steamy romance moves the bodies closer, shows more skin, and uses more charged expressions. Dark or taboo romance tends toward moodier lighting, deeper shadows, and intensity in faces and posture rather than explicit imagery.

That’s not to say there aren’t explicit images on covers. If you’re familiar with BookFunnel promos you’ve likley seen more almost naked ladies butts than anyone has a need for. But books with covers like these are generally tossed into the “dungeon” on Amazon and are much harder to find. Not a great strategy for a new author who doesn’t already have readers looking for her name. (More on this below).

Tone

lives in colour and font choices more than anywhere else. Romcoms use bright colours, playful or quirky fonts, and visual lightness. Dark romance uses deeper palettes, strong contrast, and bold fonts. Cozy romance reaches for warm, comforting colours and gentle imagery: bookshops, bakeries, small towns in golden light.

If your cover promises one thing and your story delivers another, readers will feel misled. They’ll tell you so in reviews, and those reviews will undermine every marketing effort you make. Getting the three promises right from the beginning is far easier than trying to course-correct after publication.

Platform rules and the cost of getting them wrong

On top of romance book cover conventions, you need to understand what the platforms will and won’t allow, particularly if your book leans toward the steamier end of the heat spectrum.

Amazon has what indie authors call “the dungeon”: an effective search suppression that kicks in when your cover is judged too explicit. A dungeon’d book may not appear in organic search results for broader terms. Readers can only find it if they search your exact title and author name. You lose the casual browser who’s just looking for a good steamy romance on a Thursday night, which is a significant portion of your potential readership. What triggers it isn’t always predictable. Too much skin, overly suggestive poses, certain combinations of pose and expression and clothing can all attract the algorithm’s attention.

Meta advertising has its own, stricter rules. If you plan to run Facebook or Instagram ads (and most indie authors eventually do), your cover needs to pass Meta’s content review, which is even more conservative than Amazon’s. Male chests can be an issue. Nipples are an automatic rejection, even on a cover that’s perfectly acceptable in the store itself.

I learned this the hard way with First In: Cheeky with the Fire Chief. My original cover featured a bare-chested man with his back to the camera, no nipple visible, nothing I’d consider explicit. My Meta ads kept getting rejected, repeatedly, and I couldn’t figure out why. It turned out Meta’s bots weren’t reading a man in firefighting gear. They were reading his light khaki turnout pants as skin and deciding he wasn’t wearing anything at all. I had to change the cover to get ads approved.

The lesson: if you’re going steamy and you plan to advertise, design with the bots in mind as well as the humans. Suggestive-but-safe almost always outperforms technically-allowed-but-flagged when you look at the full economics of a launch. This is one of those romance cover design tips that nobody puts in the beginner guides, and it costs authors real money when they find out about it the hard way.

Working with a designer versus going DIY

You have two main paths to a finished cover: hire a professional designer, or DIY using templates and design tools. What this lesson gives you, and what the worksheet helps you build, is the cover design brief you need regardless of which path you take.

If you’re hiring a designer,

knowing how to brief a cover designer well is as important as finding a good one. What you bring to them matters as much as what they bring to you. Come with your sub-genre, tropes, and heat level; a small collection of on-genre covers you love (and a few you don’t, with notes on why); a short vibe summary in plain language; and any representation requirements that need to be visible on the cover. The worksheet member of Author Ever After get helps you organise all of this into a one-page brief you can hand over with confidence.

If you’re going DIY,

use tools built for book cover design: Canva, BookBrush, or the templates available through your publishing platform. Start from a template that already lives in romancelandia rather than building from scratch. The three things that trip up most DIY covers are:

  • Legibility at thumbnail size: shrink your draft down to the size it will appear in an also-bought carousel on a phone and check whether you can still read the title and your name. This is the single most important test for any ebook cover design for romance authors, because the thumbnail is where most readers will first encounter your book.
  • Contrast: your title text needs to read clearly against the background image.
  • Visual hierarchy: the eye should know what to look at first, which is almost always the title, then the author name, then the imagery.

Whether you work with a designer or go DIY, consider posting a draft in a romance reader or author community with one specific question: “Based on this cover, what kind of romance would you expect, and how spicy?” The answers will tell you quickly whether the cover is speaking the right language.

Planning for ebook and print

Your ebook cover is a single front image, optimised for digital storefronts and thumbnail visibility. This is the version you’ll use in most of your marketing, and it’s the one where ebook cover design decisions matter most, because small imperfections that disappear in print are unforgiving at thumbnail size.

Your print cover is a full wrap: front, spine, and back. The back needs your blurb, author name, ISBN and barcode, and your imprint name if you’re using one. The exact dimensions depend on your trim size and final page count, which you’ll confirm in the formatting lesson. You don’t need those numbers yet, but if you’re working with a designer now, let them know a print wrap will be needed so they design the front with that in mind.

What you’re walking away with

By doing the work described in this lesson, you won’t have a finished cover. You’ll have something more useful at this stage: a romance book cover design guide specific to your book, including a clear description of your sub-genre, tropes, heat, and tone; a collection of on-genre comps you’d be happy to sit beside; your decisions on imagery style, colour direction, and font feel; a note on platform constraints that will shape your choices; and a short list of hard nos (the things you don’t want regardless of what’s trending).

With that in hand, you’ll be ready to brief a designer with confidence, or to open a DIY tool and make intentional choices rather than guessing. Either way, you’ll be designing toward a cover that tells the right reader, in half a second, that this book was written for her.

Key takeaway

Your cover is not about your taste. It’s about your reader’s expectations, and those expectations are shaped by every romance novel she’s bought before yours. A strong self-published romance cover speaks the visual language of its sub-genre, signals heat level and tone accurately, and passes platform content rules without sacrificing appeal. Knowing how to brief a cover designer (or how to make smart DIY choices) comes down to one thing: do your shelf research first, name the three promises your cover needs to make, and let those decisions drive everything else. Getting those things right before you commission or design a cover isn’t a creative constraint. It’s the whole job.

Join Author Ever After

You’ll get immediate and full access to the Romance Your Launch program (all 11 modules), a worksheet for every lesson, plus three weekly, small group support meetings to answer all your questions, and a freaking amazing community of pre-published and early career romance authors who are building their indie publishing careers alongside you.

Get more details about the community here.

Or, go straight to the application form.

Get every lesson in the Romance Your Launch course

—> Click this link and I’ll send you two to three lessons a week, starting with Lesson 1.

—>Or, join my regular email list if you’d rather just pick up from the current lesson.

This lesson is part of Module 5: Publish-ready romance in the Romance Your Launch program.

5.6 Book cover file specs for self-publishing authors

5.6 Book cover file specs for self-publishing authors

Book cover file specs for self-publishing authors Your cover designer has delivered your files. They're beautiful. You love them. You're ready to upload and get this book into the world. Understanding book cover file specs for self-publishing is the one thing standing...

5.5 Formatting check before you publish your romance novel

5.5 Formatting check before you publish your romance novel

Your cover is beautiful. But a stunning cover file that fails a platform’s technical requirements can mean reprints, rejected uploads, or colours that shift dramatically between screen and print. Here’s how to get your book cover file specs right before anything goes live.

5.4 How to format a romance novel for self-publishing

5.4 How to format a romance novel for self-publishing

Good formatting is invisible. Bad formatting costs you reviews you didn’t see coming. Here’s how to format a romance novel for self-publishing so your pages disappear and your readers stay in the story.

5.3 Romance book cover design guide for indie authors

5.3 Romance book cover design guide for indie authors

Your feelings about what looks beautiful are almost beside the point. A romance cover is a signal, not self-expression. This romance book cover design guide shows you exactly what that signal needs to say and how to say it.

5.2 ISBNs for self-published authors: what you need to know

5.2 ISBNs for self-published authors: what you need to know

Before you upload your manuscript anywhere, you need to make one decision that affects every version of your book and every platform it lives on. Here’s what to know about ISBNs for self-published authors before you hit publish.

5.1 Romance novel metadata tips for self-published authors

5.1 Romance novel metadata tips for self-published authors

Your book deserves to be found. But even a great romance novel stays invisible if your metadata isn’t doing its job. These romance novel metadata tips for self-published authors will help you get it right before you hit publish.

4.6 Final manuscript review before publishing your romance

4.6 Final manuscript review before publishing your romance

“Almost there” is where a lot of authors stall out. In this lesson, you’ll walk through a final manuscript review before publishing so you can read like a reader, catch small issues that break immersion, and finally feel confident calling your romance done.

4.5 Line edit for a romance novel that feels polished

4.5 Line edit for a romance novel that feels polished

The line edit is where your romance stops feeling like a draft and starts feeling like a book. In this lesson, you’ll learn how to make your sentences clearer, sharper, and more intentional—without turning your voice into bland, beige prose.

4.4 Scene level edit for a romance novel that hits harder

4.4 Scene level edit for a romance novel that hits harder

Scene level edit for a romance novel that readers actually feel The structural edit asked whether your story works; the scene level edit for a romance novel asks whether your story feels. You've fixed the bones: the romance arc is present, the beats are in the right...

4.3 Structural edit for a romance novel that actually works

4.3 Structural edit for a romance novel that actually works

A structural edit is where you stop fussing over sentences and zoom all the way out to your romance as a whole. In this lesson, you’ll learn how to read your draft for structure, map the romance arc, and spot the big changes that will make everything you revise next actually worth the effort.

4.2 Beta readers for romance authors who want better books

4.2 Beta readers for romance authors who want better books

Before you sink weeks into polishing sentences, you need to know if the story actually works for anyone who isn’t you. In this lesson, you’ll learn how to find and brief beta readers for romance authors so you get targeted, story-level feedback that makes revision easier instead of overwhelming.

4.1 Self-editing tips for romance authors who want readers

4.1 Self-editing tips for romance authors who want readers

Self-editing is not a punishment for an imperfect draft; it’s how you give your romance a second life with a clearer head and a sharper eye. In this lesson, you’ll set yourself up with mindset, tools, and support so your edits actually help you reach more readers.

3.5 Social media strategy for romance authors

3.5 Social media strategy for romance authors

You do not need to be everywhere online to sell romance. In this lesson, you’ll choose one platform, decide what you actually want social media to do for your career, and build a sustainable posting rhythm that turns curiosity into clicks on your lead magnet.

3.4 Simple romance author websites

3.4 Simple romance author websites

Your author website doesn’t have to impress anyone. It has to exist and give readers one clear place to go. In this lesson, you’ll pick an easy platform, claim your URL, write your copy, and build a simple, on‑brand home that points straight to your books and your list.

3.3 Email list setup for romance authors

3.3 Email list setup for romance authors

Followers belong to the platform. Your list belongs to you. In this lesson, you’ll connect your lead magnet to a clean email setup and draft a four‑email welcome sequence so every new romance reader is welcomed, warmed up, and ready when you launch your book.

Need to go back to a previous lesson?

Return to Module 5: Publish-ready romance to see all six lessons. 

Or go back to the Romance Your Launch home page to see all the modules and links to their hub pages.

Want the next lesson in your inbox?

This post is part of the Romance Your Launch series—a lesson-by-lesson guide to self-publishing your romance novel, written for pre-published and early career romance authors. 

.

—> Click this link, drop in your name and email address, and I’ll send you two to three lessons a week, starting with Lesson 1.

.

—> If you’d rather just pick up where the series is, join my regular email list from this link. 

5.2 ISBNs for self-published authors: what you need to know

5.2 ISBNs for self-published authors: what you need to know

ISBNs for self-published authors: what you need to know

Before you upload a single file to Amazon KDP or IngramSpark (my personal publishing nemesis, more on that another day), you need to make one decision that affects every version of your book, every platform it appears on, and your identity as a publisher for the life of your career. Understanding ISBNs for self-published authors is more consequential than most first-time romance authors realise, and getting it wrong is the kind of thing that’s messy to fix three books into your backlist.

That decision is what to do about your ISBNs.

It sounds technical, and it is, a little. But the underlying question is actually quite simple, and by the end of this lesson you’ll know exactly what you need, what your options are, and what to do next.

What an ISBN actually is

ISBN stands for International Standard Book Number. It’s a 13-digit identifier that is unique to a specific edition of a specific book. Your ebook, your paperback, and your hardcover are each a different edition, and each gets its own ISBN. Every significantly revised edition gets a new one too.

Think of an ISBN the way you’d think of a product barcode. The barcode on a can of soup tells every system in the supply chain exactly what that product is. An ISBN does the same thing for your book. It tells libraries, bookstores, distributors, retailers, and industry databases exactly which book they’re dealing with, and who published it. For romance authors specifically, getting your own ISBN is also the first step in establishing a publishing imprint for indie authors that looks professional in every catalogue and database your book lands in.

That last part is why the decision matters so much.

Every ISBN is assigned to a publisher. When a library catalogues your book, when a bookstore orders it, when a distributor lists it in their system, the ISBN tells them who the publisher is. If you use a free ISBN from Amazon KDP, the publisher of record is Amazon. If you use a free ISBN from IngramSpark, the publisher of record is IngramSpark. If you purchase your own ISBN through the official agency in your country, the publisher of record is you, or more specifically, whatever publishing imprint name you register (which can be your name or pen name, if you prefer).

This distinction matters more in some situations than others, and understanding it is what will help you choose the right path for your publishing goals.

Your three options

Option 1: use a free KDP-assigned ISBN

Amazon KDP offers a free ISBN for your paperback. If you use it, Amazon is the publisher of record and the ISBN is locked to KDP. You cannot use it to distribute your print book through IngramSpark or any other platform. This works fine if you’re publishing exclusively on Amazon with no plans for bookstore or library distribution. The limitation is that the ISBN is not portable. If you ever want to distribute your print book more widely, you’ll need a new ISBN and a new upload.

One important note: KDP does not assign ISBNs for ebooks. Amazon uses their own proprietary identifier (the ASIN) for Kindle ebooks instead. The ISBN vs ASIN question only becomes relevant for your print edition. Your ebook gets an ASIN automatically when it goes live, and you don’t need to do anything to make that happen.

Option 2: use a free IngramSpark-assigned ISBN

IngramSpark also offers a free ISBN if you publish through their platform. The same principle applies: IngramSpark becomes the publisher of record and the ISBN is tied to their system. This works well if IngramSpark is your primary print distributor and you want wider distribution than KDP alone provides. The same portability limitation applies. It’s locked to IngramSpark and cannot be used on KDP or any other retailer.

A note on using both platforms with their respective free ISBNs

Some authors try to solve the distribution problem by listing their paperback on both KDP (with a KDP ISBN) and IngramSpark (with an IngramSpark ISBN). This sounds logical but creates its own problems. Two different ISBNs for the same book can generate two separate product listings on Amazon and in industry databases, which splits your reviews across both pages and weakens your social proof. A book with 47 reviews looks significantly more credible than two listings with 23 and 24 reviews each. You also risk a distribution conflict if KDP expanded distribution and IngramSpark are both active simultaneously, with the same book being offered through Ingram by two different sources at potentially different prices. And in industry databases, the same book appearing under two different publishers of record (Amazon and IngramSpark) looks unprofessional to anyone who looks closely, including librarians and booksellers.

The cleaner solution is Option 3.

Option 3: purchase your own ISBNs

When you purchase your own ISBN through the official agency in your country, you register it under your publishing imprint name. That imprint becomes the publisher of record across every platform and every database, giving you a consistent publishing identity for indie authors, full portability across distributors, and maximum flexibility for your entire backlist. One ISBN assigned to both your KDP and IngramSpark editions means one clean listing, consolidated reviews, and no distribution conflicts. This is the path that makes the most sense for romance authors building a long-term career.

A side note on the cost of ISBNs

If you’re based in the US and the cost of buying your own ISBNs feels frustrating, there’s a reason for that, and it’s not how the system works everywhere.

The United States is one of the only countries in the world where ISBN assignment is handled by a private company (Bowker) rather than a government or national library. That’s why a single US ISBN costs $125 and a block of ten costs $295. It’s a privatised system, and authors pay the price for it.

In many other countries, ISBNs are issued free or at very low cost through national libraries or government agencies. Canada, New Zealand, South Africa, and Nigeria all offer free ISBNs to their authors. Several European countries offer free or heavily subsidised ISBNs as well. The United Kingdom, like the US, uses a private agency (Nielsen) and charges accordingly.

If you’re outside the US, it’s worth checking your country’s national ISBN agency before you assume you’ll need to pay. The International ISBN Agency maintains a full directory of national agencies at isbn-international.org/agencies, and a quick search may save you a meaningful amount of money.

If you’re a US-based author building a backlist, buying a block of one hundred ISBNs at $575 upfront is the most cost-effective path. It works out to $5.75 per ISBN, which is reasonable once you account for how many editions, formats, and future titles you’ll be assigning them to.

Where to get your ISBNs

ISBNs are assigned nationally, so where you get them depends on where you live.

đŸ‡ș🇾 United States:

Through Bowker at myidentifiers.com.

As of April 2026, a single ISBN costs $125, a block of ten costs $295, and a block of one hundred costs $575. If you’re planning to publish a series with ebooks, paperbacks, audiobooks, special editions, boxsets, large print, and/or translations, buying a block of one hundred makes sense. Each format requires its own ISBN, and those add up faster than most first-time authors expect.

🇹🇩 Canada:

Completely free through Library and Archives Canada.

You register online, provide your publisher information, and receive your first block of ten ISBNs within two weeks. They list you or your imprint as publisher of record, not the retailer. If you’re a Canadian author asking whether do you need an ISBN to self-publish under your own name, the answer is yes, and there is no reason not to get one.

Important note in May 2026: The notice on Library and Archives Canada is warning:

We have recently received a large number of requests that require extra processing. It may take up to two months to process your request. We apologize for the inconvenience and thank you for your patience. 

If you are requesting your first batch of ten ISBNs, do so now so you have them before you publish! Plan ahead. 

🇬🇧 United Kingdom:

Through Nielsen at nielsenisbnstore.com.

🇩đŸ‡ș Australia:

Through Thorpe-Bowker at isbn.org.au.

🌍 Elsewhere:

The International ISBN Agency maintains a directory of all national agencies at isbn-international.org/agencies.

‌ Important note on third-party resellers ‌

Some resellers offer ISBNs in the US, UK, and elsewhere at slightly lower prices. Please don’t use them. ISBNs purchased through a third-party reseller often list that reseller as the publisher of record, not you. That defeats the entire point of buying your own. Always purchase directly from your country’s official ISBN agency.

How many ISBNs do you need?

Each distinct edition of your book requires its own ISBN. Here’s how that looks for a typical romance novel:

Publishing exclusively on Amazon KDP with a paperback

A minimum of one ISBN for the paperback. Your Kindle ebook gets an ASIN from Amazon automatically. The ISBN vs ASIN distinction here is simple: ISBNs are for print, ASINs are Amazon’s system for ebooks, and the two don’t overlap.

Publishing on both KDP and IngramSpark with wide ebook distribution

A minimum of two ISBNs, one for the ebook and one for the paperback. The best practice is to give your KDP and IngramSpark paperbacks distinct ISBNs, even though you can sometimes get away with a shared one if you set things up in the right order. IngramSpark and KDP often differ in paper quality, binding, or cover finish, and separate ISBNs allow bookstores to identify which printing house they’re ordering from. It also avoids a distribution conflict if expanded distribution is ever enabled on both platforms simultaneously.

Publishing a hardcover, large print edition, and audiobook

One additional ISBN for each format. Note that audiobook distribution has its own platform-specific considerations we’ll cover separately.

Revised editions

Revised editions get new ISBNs if the content changes significantly. A corrected reprint (fixing typos, updating back matter) does not require a new one as long as the book is substantively the same. Amazon’s own guideline: updates that result in a page count change of more than 10% must be published as a new edition with a new ISBN.

Setting up your imprint

If you’re purchasing your own ISBNs, you’ll register them under a publisher name. This is your publishing imprint as an indie author, and it’s worth a few minutes of thought before you type something in.

Your imprint name will appear as the publisher on your Amazon page, in library catalogues, on IngramSpark listings, and in the industry databases that booksellers and librarians use. It doesn’t need to be elaborate. It just needs to be something you’d be comfortable with on every book you publish, something that doesn’t already belong to an existing publisher (please do a search before you commit), and something that reads as an independent press rather than a personal name alone.

Common approaches romance authors use:

  • Something evocative that fits their brand (Midnight Bloom Press, Ember House Books)
  • Something simple and location-adjacent (Pacific Rim Publishing, Ridgeline Press)
  • Their own name with “Publishing” or “Press” appended

Keep it simple. You can always create additional imprints later if your publishing life expands into significantly different genres. One imprint you’re comfortable with and proud of is enough for now.

Once you have your imprint name and your ISBNs, register your title information in your country’s publishing database. In the US, this is done through Books In Print via myidentifiers.com at the same time you purchase. In Canada, title registration is handled separately through ISBN Canada after publication. This registration is what puts your book in the database that booksellers, librarians, and distributors use to look up and order titles. It’s a small step with a real payoff for any romance author with ambitions beyond Amazon-only distribution.

A note on ASINs

An ASIN is an Amazon Standard Identification Number, a unique identifier that Amazon automatically assigns to every product in its catalogue, including books. The ISBN vs ASIN question comes up a lot for first-time self-published romance authors, and the simplest answer is this: they serve different purposes and live in different systems. ISBNs belong to the wider publishing world. ASINs belong to Amazon.

For Kindle ebooks, your ASIN will always start with the letter B followed by nine alphanumeric characters (for example, B087F4TTHW). For print books, Amazon uses the book’s ISBN-10 as the ASIN, so your paperback’s ASIN will look like a 10-digit number rather than starting with B. If you published your paperback without your own ISBN and used a KDP-assigned identifier instead, it will get a B-starting ASIN like a digital product.

Your ASIN is worth knowing because it’s embedded in your Amazon product link and you’ll use it if you run ads. Some promo sites will ask for it. And some of the reporting tools you’ll use to track your book’s performance willalso require you share it. But it’s not something you need to manage or apply for. Amazon creates it when your book goes live, it stays attached to that listing permanently, and you’ll find it in your title’s URL and as the first entry in your product details.

Key takeaway

The ISBN decision is one you make once per book per edition, and it follows you. Using a free retailer-assigned ISBN is fine for a first book with no plans for wide distribution. But if you’re building a backlist, want bookstore or library access, or simply want to be the publisher of record on your own work, buying your own ISBNs under your own publishing imprint is the right call from the start. It costs more in some countries than others (nothing in Canada!), but the flexibility and professional identity it gives you are worth it.

Join Author Ever After

You’ll get immediate and full access to the Romance Your Launch program (all 11 modules), a worksheet for every lesson, plus three weekly, small group support meetings to answer all your questions, and a freaking amazing community of pre-published and early career romance authors who are building their indie publishing careers alongside you.

Get more details about the community here.

Or, go straight to the application form.

Get every lesson in the Romance Your Launch course

—> Click this link and I’ll send you two to three lessons a week, starting with Lesson 1.

—>Or, join my regular email list if you’d rather just pick up from the current lesson.

This lesson is part of Module 5: Publish-ready romance in the Romance Your Launch program.

5.6 Book cover file specs for self-publishing authors

5.6 Book cover file specs for self-publishing authors

Book cover file specs for self-publishing authors Your cover designer has delivered your files. They're beautiful. You love them. You're ready to upload and get this book into the world. Understanding book cover file specs for self-publishing is the one thing standing...

5.5 Formatting check before you publish your romance novel

5.5 Formatting check before you publish your romance novel

Your cover is beautiful. But a stunning cover file that fails a platform’s technical requirements can mean reprints, rejected uploads, or colours that shift dramatically between screen and print. Here’s how to get your book cover file specs right before anything goes live.

5.4 How to format a romance novel for self-publishing

5.4 How to format a romance novel for self-publishing

Good formatting is invisible. Bad formatting costs you reviews you didn’t see coming. Here’s how to format a romance novel for self-publishing so your pages disappear and your readers stay in the story.

5.3 Romance book cover design guide for indie authors

5.3 Romance book cover design guide for indie authors

Your feelings about what looks beautiful are almost beside the point. A romance cover is a signal, not self-expression. This romance book cover design guide shows you exactly what that signal needs to say and how to say it.

5.2 ISBNs for self-published authors: what you need to know

5.2 ISBNs for self-published authors: what you need to know

Before you upload your manuscript anywhere, you need to make one decision that affects every version of your book and every platform it lives on. Here’s what to know about ISBNs for self-published authors before you hit publish.

5.1 Romance novel metadata tips for self-published authors

5.1 Romance novel metadata tips for self-published authors

Your book deserves to be found. But even a great romance novel stays invisible if your metadata isn’t doing its job. These romance novel metadata tips for self-published authors will help you get it right before you hit publish.

4.6 Final manuscript review before publishing your romance

4.6 Final manuscript review before publishing your romance

“Almost there” is where a lot of authors stall out. In this lesson, you’ll walk through a final manuscript review before publishing so you can read like a reader, catch small issues that break immersion, and finally feel confident calling your romance done.

4.5 Line edit for a romance novel that feels polished

4.5 Line edit for a romance novel that feels polished

The line edit is where your romance stops feeling like a draft and starts feeling like a book. In this lesson, you’ll learn how to make your sentences clearer, sharper, and more intentional—without turning your voice into bland, beige prose.

4.4 Scene level edit for a romance novel that hits harder

4.4 Scene level edit for a romance novel that hits harder

Scene level edit for a romance novel that readers actually feel The structural edit asked whether your story works; the scene level edit for a romance novel asks whether your story feels. You've fixed the bones: the romance arc is present, the beats are in the right...

4.3 Structural edit for a romance novel that actually works

4.3 Structural edit for a romance novel that actually works

A structural edit is where you stop fussing over sentences and zoom all the way out to your romance as a whole. In this lesson, you’ll learn how to read your draft for structure, map the romance arc, and spot the big changes that will make everything you revise next actually worth the effort.

4.2 Beta readers for romance authors who want better books

4.2 Beta readers for romance authors who want better books

Before you sink weeks into polishing sentences, you need to know if the story actually works for anyone who isn’t you. In this lesson, you’ll learn how to find and brief beta readers for romance authors so you get targeted, story-level feedback that makes revision easier instead of overwhelming.

4.1 Self-editing tips for romance authors who want readers

4.1 Self-editing tips for romance authors who want readers

Self-editing is not a punishment for an imperfect draft; it’s how you give your romance a second life with a clearer head and a sharper eye. In this lesson, you’ll set yourself up with mindset, tools, and support so your edits actually help you reach more readers.

3.5 Social media strategy for romance authors

3.5 Social media strategy for romance authors

You do not need to be everywhere online to sell romance. In this lesson, you’ll choose one platform, decide what you actually want social media to do for your career, and build a sustainable posting rhythm that turns curiosity into clicks on your lead magnet.

3.4 Simple romance author websites

3.4 Simple romance author websites

Your author website doesn’t have to impress anyone. It has to exist and give readers one clear place to go. In this lesson, you’ll pick an easy platform, claim your URL, write your copy, and build a simple, on‑brand home that points straight to your books and your list.

3.3 Email list setup for romance authors

3.3 Email list setup for romance authors

Followers belong to the platform. Your list belongs to you. In this lesson, you’ll connect your lead magnet to a clean email setup and draft a four‑email welcome sequence so every new romance reader is welcomed, warmed up, and ready when you launch your book.

Need to go back to a previous lesson?

Return to Module 5: Publish-ready romance to see all six lessons. 

Or go back to the Romance Your Launch home page to see all the modules and links to their hub pages.

Want the next lesson in your inbox?

This post is part of the Romance Your Launch series—a lesson-by-lesson guide to self-publishing your romance novel, written for pre-published and early career romance authors. 

.

—> Click this link, drop in your name and email address, and I’ll send you two to three lessons a week, starting with Lesson 1.

.

—> If you’d rather just pick up where the series is, join my regular email list from this link.Â